Dreaming of beautiful engineered hardwood floors gracing your home? You’ve picked the perfect material, but now comes the big question: how will you install it? For many DIYers, the thought of tackling this project can bring on a wave of questions, especially when it comes to choosing the right tool. It’s easy to get lost in a sea of staplers, wondering which one will actually work for your specific engineered hardwood and won’t leave you with frustration instead of a stunning floor.
Picking the wrong flooring stapler can lead to damaged planks, uneven installation, and a whole lot of wasted time and money. You want a tool that’s powerful enough to secure your beautiful new floors but gentle enough not to ruin them. That’s where understanding the ins and outs of flooring staplers for engineered hardwood becomes crucial. Don’t worry, we’re here to help you navigate this important decision.
In this post, we’ll break down exactly what you need to know to choose the best flooring stapler for your engineered hardwood project. You’ll learn about the key features to look for, understand why certain staplers are better suited for this type of flooring, and discover how to make a confident choice that sets you up for a successful and beautiful installation. Get ready to say goodbye to confusion and hello to perfectly laid floors!
Our Top 5 Flooring Stapler For Engineered Hardwood Recommendations at a Glance
Top 5 Flooring Stapler For Engineered Hardwood Detailed Reviews
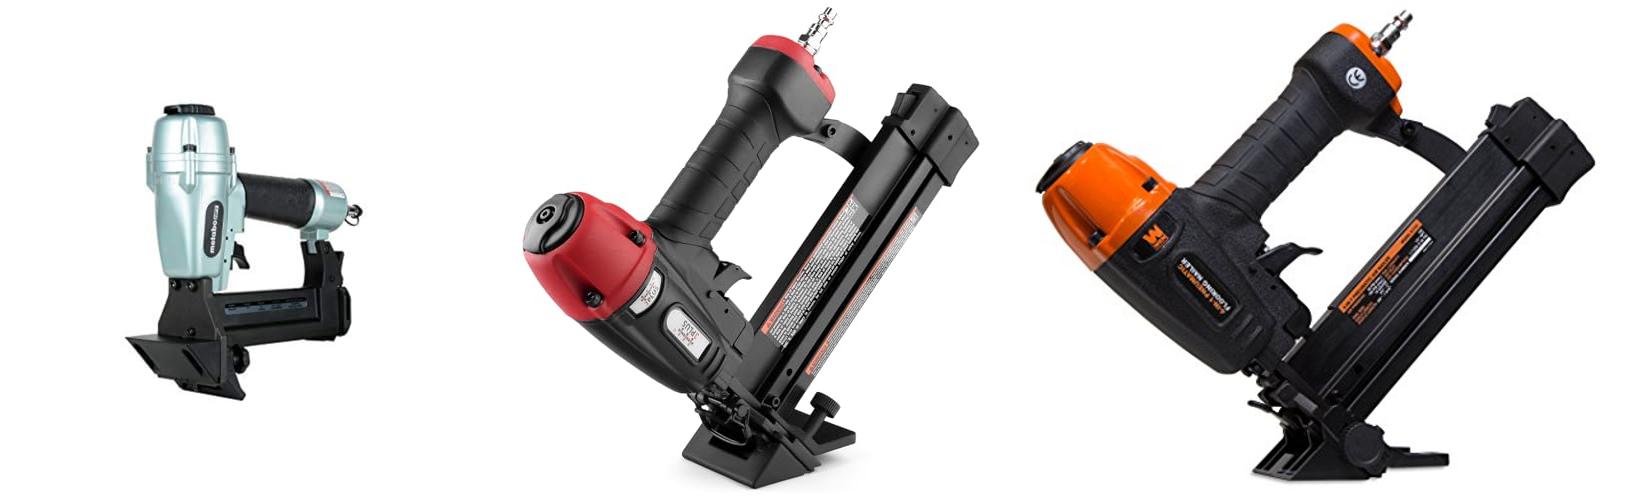
1. Metabo HPT Flooring Stapler

Rating: 8.9/10
The Metabo HPT Flooring Stapler (N4004AB) is a top-tier tool for anyone installing hardwood floors. It’s a pneumatic stapler, meaning it uses compressed air to drive staples. This makes it powerful and efficient. It’s designed for 18-gauge staples, which are common for hardwood flooring. The stapler can handle staples from 1/2 inch up to 1-9/16 inches long. This tool has won an award for being the Pro Preferred Nailer for nine years straight. That’s a long time! It’s built to be reliable and perform well, even with heavy use.
What We Like:
- It’s incredibly lightweight, weighing only 3.1 lbs. This makes it easy to use for long periods without getting tired.
- The tool-less depth adjustment is a big plus. You can easily change how deep the staples go for different types of hardwood.
- It features a sequential trigger. This means you have to pull the trigger each time you want to fire a staple, which helps you place staples exactly where you want them.
- The 360-degree adjustable exhaust port lets you direct the air away from you. This keeps your workspace cleaner.
- It has a comfortable over-molded rubber grip. This makes it easier to hold and control.
- The high-grade composite magazine is strong. It helps prevent jams and keeps the tool light.
- It’s been recognized as a pro-preferred tool for many years. This shows its reliability and quality.
What Could Be Improved:
- The stapler works best with Metabo HPT brand nails. You might not be able to use other brands as easily.
Overall, the Metabo HPT Flooring Stapler is a fantastic choice for professional flooring installers and serious DIYers. Its user-friendly design and proven performance make it a valuable addition to any toolkit.
2. 3PLUS HFS509040SP 4-in-1 Pneumatic 18 Gauge Flooring Stapler/Nailer

Rating: 8.7/10
The 3PLUS HFS509040SP 4-in-1 Pneumatic 18 Gauge Flooring Stapler/Nailer is a versatile tool for your flooring projects. It handles different fasteners, making it useful for various tasks. This tool is designed for installing engineered or solid hardwood flooring.
What We Like:
- It works with 18 gauge brad nails from 3/4” to 2” and 18 gauge narrow crown staples from 5/8” to 1-1/2”.
- It is made for 1/4”-5/8” engineered or solid hardwood flooring.
- You can easily change it to work as a regular stapler or brad nailer.
- The exhaust cover turns a full 360° to keep air away from you.
- It has a tool-free depth adjustment for setting nails perfectly.
- The quick jam release makes fixing problems easy.
What Could Be Improved:
- It requires a separate air compressor to operate.
- The 1/4” crown staple size might limit some specific flooring applications.
This 4-in-1 tool offers great flexibility for flooring work. It’s a practical choice for DIYers and professionals alike.
3. WEN 61741K 4-in-1 18-Gauge Pneumatic Flooring Nailer and Stapler

Rating: 9.1/10
Tackling your next flooring project just got a whole lot easier with the WEN 61741K 4-in-1 Pneumatic Flooring Nailer and Stapler. This versatile tool handles both 18-gauge brad nails and 1/4-inch narrow crown staples, making it a true workhorse for a variety of jobs. Whether you’re laying down hardwood, installing trim, or doing other DIY tasks, this nailer and stapler has you covered.
What We Like:
- It drives 18-gauge brad nails from 5/8 to 2 inches.
- It shoots 1/4-inch narrow crown staples from 1/2 to 1-5/8 inches.
- The removable, spring-loaded flooring shoe helps you angle fasteners at 45 degrees for a clean finish.
- Clearing jams is simple with the quick-release nose.
- You can adjust the air exhaust to direct air away from your face.
- The magazine holds up to 100 fasteners, so you can work longer without refilling.
- It comes with a handy carrying case for easy storage and transport.
- You also get two hex keys, a removable non-mar tip for delicate surfaces, and oil to keep it running smoothly.
What Could Be Improved:
- The flooring shoe is removable, which is nice, but some users might prefer a permanently attached option for added stability during quick tasks.
- While it’s a 4-in-1 tool, it’s primarily designed for flooring applications, limiting its use for other types of fastening jobs.
This WEN nailer and stapler is a solid choice for DIYers and professionals alike. It offers great versatility and useful features that will help you complete your flooring projects efficiently.
4. 3PLUS HFSNSP 2-in-1 Pneumatic Flooring Nailer/Stapler

Rating: 9.1/10
Tackle your next flooring project with confidence using the 3PLUS HFSNSP 2-in-1 Pneumatic Flooring Nailer/Stapler. This versatile tool combines the power of a nailer and a stapler, making it a great choice for both hardwood and engineered flooring installations. Its pneumatic driving action delivers consistent results, while the included accessories ensure you have everything you need to get started.
What We Like:
- It’s a 2-in-1 tool, so you can use 15-1/2 gauge staples and 16 gauge L cleats.
- The cleats can be from 1-1/2″ to 2″ long, giving you options.
- It comes with interchangeable flooring plates. These plates fit all sizes of flooring.
- The long reach handle is removable. This makes it easy to store and transport.
- A mallet with white rubber is included. This helps prevent damage to your flooring.
- The tool uses pneumatic power. This means it’s strong and reliable.
What Could Be Improved:
- The tool’s weight might be a bit much for some users over long periods.
- Finding replacement parts or accessories could sometimes be a challenge.
- The instruction manual could be clearer for beginners.
For DIYers and professionals alike, this flooring nailer/stapler offers a lot of value. It’s a solid option that simplifies the flooring installation process.
5. Freeman 4-in-1 Pneumatic 18-Gauge Mini Flooring Nailer

Rating: 8.8/10
Tackle a wide range of projects with the versatile Freeman 4-in-1 Pneumatic 18-Gauge Mini Flooring Nailer, Brad Nailer, and Narrow Crown Stapler. This multi-purpose tool is designed to handle everything from hardwood flooring to delicate trim work, making it a valuable addition to any DIYer’s or professional’s toolkit.
What We Like:
- It’s a true 4-in-1 tool, handling flooring, brad nails, and staples with one magazine. This saves you money and time.
- It’s built tough with a hardened steel drive blade and aluminum parts, so it lasts a long time.
- You can easily adjust the driving depth without any tools. Just turn the wheel!
- Clearing jams is super simple with the quick jam release. You get back to work fast.
- A reload indicator shows you how many fasteners are left. No more guessing.
- The ergonomic design and comfort grip handle make it easy to hold and use for long periods.
- The adjustable exhaust lets you aim air away from your face.
- It comes with a handy 45-degree angle flooring attachment.
What Could Be Improved:
- While it’s great for many tasks, it might not be the best choice for very heavy-duty framing.
- The 1/4″ narrow crown stapler capacity is limited to 1-5/8″, which might not be enough for some upholstery jobs.
This Freeman nailer is a fantastic all-around tool for many home improvement and craft projects. Its versatility and ease of use make it a smart investment.
Choosing the Right Flooring Stapler for Your Engineered Hardwood Project
Installing engineered hardwood flooring yourself can be a rewarding project. One of the most important tools for this job is a flooring stapler. This tool makes it easy to secure your beautiful new floors. Let’s dive into what you need to know before you buy.
Key Features to Look For
1. Staple Compatibility
Not all staplers work with all staples. You need a stapler that uses the right size and type of staples for your engineered hardwood planks. Check the manufacturer’s recommendations. Most staplers are designed for specific staple lengths and widths. Make sure the stapler you choose matches your flooring’s thickness.
2. Air Pressure (PSI) Adjustment
The power of the stapler is important. You need enough power to drive the staple fully into the subfloor. However, too much power can damage the flooring. Look for a stapler with adjustable air pressure. This lets you fine-tune the stapler’s force for different wood types and thicknesses. A good range is usually between 70-100 PSI.
3. Magazine Capacity
The magazine holds the staples. A larger capacity means you won’t have to reload as often. This saves you time and keeps your workflow smooth. Consider how many staples the magazine can hold. A higher number is generally better for larger projects.
4. Ergonomics and Weight
You’ll be holding this tool for a while. A comfortable grip and a balanced weight make a big difference. A lighter stapler can reduce fatigue. Check reviews for comments on how easy it is to handle. Some staplers have rubber grips for better comfort.
5. Durability and Build Quality
You want a stapler that will last. Look for staplers made from strong materials. Die-cast aluminum is a common and durable choice. A well-built stapler can withstand regular use. Think about how often you’ll use it. For occasional DIY projects, a less robust model might be fine. For frequent use, invest in a sturdier option.
Important Materials
The materials used in a flooring stapler affect its performance and lifespan.
- Aluminum Body: Many good staplers use die-cast aluminum. This material is strong yet lightweight. It helps prevent the tool from becoming too heavy during long installation sessions.
- Steel Components: Internal parts, like the driver blade and piston, are often made of hardened steel. This ensures they can withstand the repeated impact of driving staples.
- Rubber Grips: These are important for user comfort. They help absorb vibrations and provide a secure hold, reducing the chance of slips.
Factors That Improve or Reduce Quality
Improving Quality
- Smooth Firing Mechanism: A stapler that fires cleanly and consistently will make your job easier. It prevents staple jams and ensures each staple is driven correctly.
- Deep Penetration Adjustment: The ability to control how deep the staple goes is crucial. This feature helps prevent damaging the hardwood or leaving staples too proud.
- Reliable Staple Feeding: A stapler that feeds staples without jamming is a game-changer. This means less downtime and frustration.
Reducing Quality
- Plastic Components: While some plastic parts are acceptable, too many can make the stapler feel flimsy and less durable.
- Staple Jams: Frequent staple jams are a major annoyance. They slow down your work and can damage the flooring if you have to force them out.
- Inconsistent Firing: If the stapler sometimes drives staples too deep or not deep enough, it can lead to poor floor adhesion and a less professional look.
User Experience and Use Cases
A good flooring stapler makes the installation process much smoother.
- DIY Homeowners: For those tackling a flooring project themselves, an easy-to-use and reliable stapler is essential. It helps achieve professional-looking results without needing to hire professionals.
- Professional Installers: For pros, speed and durability are key. They need a stapler that can handle heavy use day in and day out.
- Small Projects: Even for a single room, a flooring stapler is a worthwhile investment. It ensures the planks are securely fastened for longevity.
- Larger Renovations: For whole-house flooring jobs, a high-quality, durable stapler is a must. It will save you time and effort over the long haul.
Choosing the right flooring stapler is an important step. By considering these features, materials, and quality factors, you can find a tool that will help you successfully install your engineered hardwood floors.
Frequently Asked Questions (FAQ)
Q: What is the most important feature of a flooring stapler for engineered hardwood?
A: The most important feature is its ability to drive staples at the correct depth without damaging the wood. Adjustable air pressure and a reliable staple feeding mechanism are key for this.
Q: Can I use a regular staple gun for engineered hardwood?
A: No, a regular staple gun is not strong enough and does not use the correct type of staples. You need a specialized flooring stapler designed for this purpose.
Q: What kind of staples do I need for engineered hardwood?
A: You need L-shaped staples specifically designed for flooring staplers. The size and length will depend on the thickness of your engineered hardwood planks.
Q: How do I adjust the air pressure on a flooring stapler?
A: Most staplers connect to an air compressor. You adjust the air pressure at the compressor’s regulator. Consult your stapler’s manual for recommended PSI ranges.
Q: How often should I clean my flooring stapler?
A: It’s a good idea to clean your stapler after each significant use. Remove any dust or debris from the magazine and firing mechanism.
Q: What is the difference between a pneumatic and electric flooring stapler?
A: Pneumatic staplers use compressed air and are generally more powerful and durable. Electric staplers are convenient but may not have the same power or longevity.
Q: Can I use a flooring stapler for solid hardwood too?
A: Yes, many flooring staplers can be used for both engineered and solid hardwood, but always check the manufacturer’s specifications.
Q: What happens if I don’t drive the staples deep enough?
A: If staples aren’t driven deep enough, the flooring planks won’t be securely fastened. This can lead to loose boards and potential damage over time.
Q: My stapler is jamming. What should I do?
A: First, disconnect the air supply. Then, check the staple strip for any bent or misaligned staples. You may need to remove the jam manually according to your stapler’s instructions.
Q: How much should I expect to spend on a good flooring stapler?
A: Prices can vary widely, but a good quality flooring stapler for DIY use typically ranges from $100 to $300. Professional-grade models can cost more.
In conclusion, every product has unique features and benefits. We hope this review helps you decide if it meets your needs. An informed choice ensures the best experience.
If you have any questions or feedback, please share them in the comments. Your input helps everyone. Thank you for reading.

Hi, I’m Mette Morgan—a lifelong pet enthusiast and the heart behind PetNobs.com.. My journey with animals began at an early age, and over the years, I’ve gathered invaluable experiences and insights on everything from everyday pet care to the unique quirks each animal brings to our lives. Here at PetNobs, I share my genuine passion, practical tips, and personal stories to help you create a loving, well-informed environment for your furry, feathered, or scaled friends. Welcome to my little corner of the pet world—it’s a joy to have you here!