Imagine a chilly winter day or a sweltering summer afternoon. What’s the first thing you notice? Often, it’s how your home feels. Is it drafty and uncomfortable, or a cozy haven? If your home isn’t holding its temperature well, you might be losing energy and money. Many homeowners struggle with knowing how to fix this. Picking the right DIY spray foam insulation can feel like a puzzle with too many pieces.
You want a home that’s comfortable all year round, and you want to save on your energy bills. But with so many types of spray foam and different brands, it’s easy to get confused. You might worry about making the wrong choice, wasting money, or even doing a bad job. It’s a big decision, and you want to get it right.
This post is here to help! We’ll break down the world of DIY spray foam insulation so you can understand it clearly. You’ll learn what to look for, what questions to ask yourself, and how to choose the best option for your home. By the end, you’ll feel confident in making a smart decision that will make your home more comfortable and energy-efficient.
Our Top 5 Do It Yourself Spray Foam Insulation Recommendations at a Glance
Top 5 Do It Yourself Spray Foam Insulation Detailed Reviews
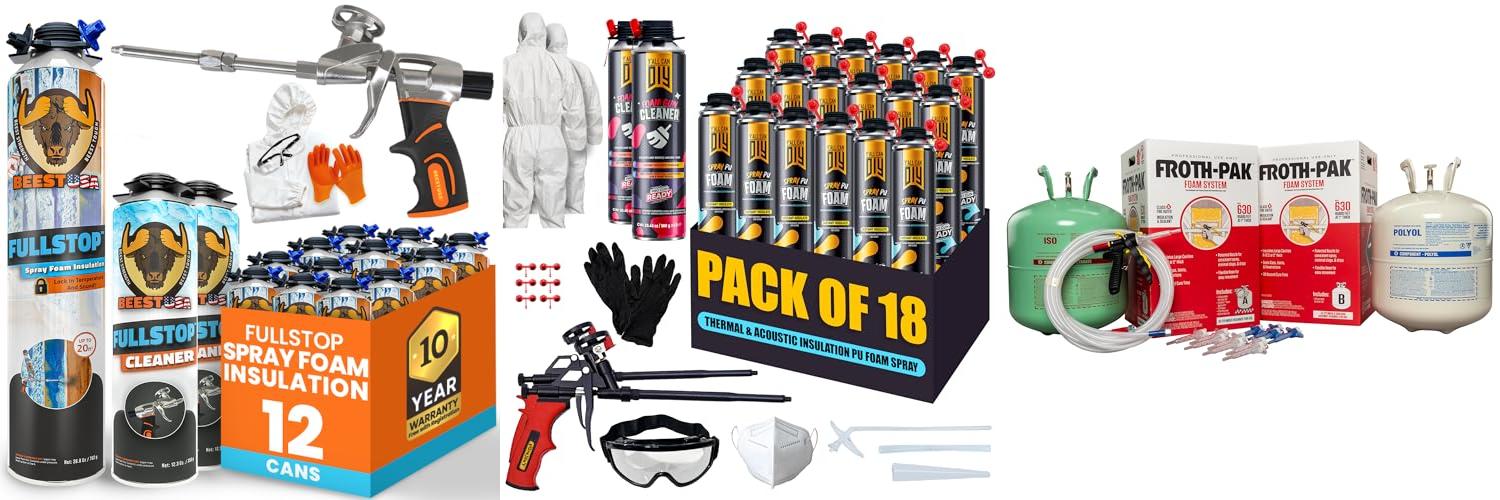
1. BEEST FullStop Spray Foam Insulation Kit for Walls and Attic – 240 Board ft/sq.ft. Perfect Heat & Acoustic Insulation for Reduced Energy Bills – 12x Spray Foam Can

Rating: 8.6/10
Tired of high energy bills and noisy rooms? The BEEST FullStop Spray Foam Insulation Kit is your answer! This all-in-one package helps you create a more comfortable and energy-efficient home. It’s designed for easy DIY use, making it perfect for sealing up gaps and cracks in your walls, attic, and other hard-to-reach places. You get everything you need to get the job done right, from the foam itself to all the safety gear.
What We Like:
- Excellent thermal insulation with an R-Value of 8.14 at 2 inches thick.
- Great soundproofing helps reduce noise.
- Covers a large area (240 sq. ft.) with 12 cans.
- Includes a professional spray gun, cleaner, and safety gear for a complete kit.
- Forms an airtight seal to stop drafts and save energy.
- Adheres well to many different surfaces like wood, concrete, and metal.
- The advanced hybrid foam offers strength and flexibility.
- It’s moisture-cured and ozone-safe, making it environmentally friendly.
- Can be painted or coated after curing to match your decor.
- Easy to follow instructions mean you don’t need a contractor.
What Could Be Improved:
- Requires a specific temperature range (68–77°F) for best application.
- Curing time might vary depending on the thickness and conditions.
This BEEST kit offers a smart and effective way to improve your home’s insulation and reduce energy costs. It’s a solid choice for anyone looking to make their living space more comfortable and efficient.
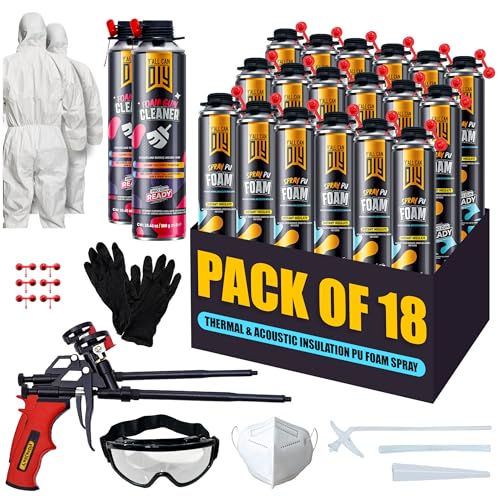
2. Closed Cell Spray Foam Insulation Kit (18 Pack – 32.8 oz) Expanding Foam for Thermal & Soundproofing
Rating: 9.4/10
Tackle your home improvement projects with the Y’allCanDiy Closed Cell Spray Foam Insulation Kit. This comprehensive 18-pack offers everything you need to seal gaps, insulate, and soundproof. It’s designed for DIY enthusiasts and professionals alike, providing a robust solution for various sealing needs.
What We Like:
- Comprehensive Kit: Comes with 18 cans of foam, two Teflon-coated guns, cleaners, safety gear (suits, glasses, masks), and plenty of gloves and straws. You get all the essentials in one box.
- Excellent Insulation: The closed-cell foam provides great thermal and soundproofing. It effectively seals drafts, keeping your home comfortable and energy-efficient.
- Versatile Use: Perfect for sealing around windows, doors, pipes, and filling cracks. It works for attics, walls, and any other spot needing a good seal.
- Durable Performance: The foam holds up well against tough conditions like extreme temperatures and moisture, ensuring a long-lasting seal.
- User-Friendly: Designed for DIYers, the kit includes easy-to-use tools and safety equipment. The instructions make the process straightforward.
What Could Be Improved:
- Curing Time: While higher humidity speeds up curing, it might take a bit longer in drier conditions.
- Application Temperature: It works best between 60°F–90°F (15°C–32°C), so you might need to wait for warmer weather for outdoor jobs.
This Y’allCanDiy kit is a fantastic all-in-one solution for anyone looking to improve their home’s insulation and comfort. Its thorough packaging and quality performance make it a smart choice for a variety of DIY projects.
3. Froth Pak 630 Spray Foam Insulation Kit

Rating: 8.8/10
Looking for a powerful way to seal and insulate your home? The Froth Pak 630 Spray Foam Insulation Kit is your solution. This kit makes it easy to fill gaps and cracks, keeping your home comfortable and saving you money on energy bills. It’s a two-part foam system that expands to create a strong barrier against air and moisture.
What We Like:
- Made right here in the USA!
- It’s fire-rated, making your home safer.
- Covers a lot of space – up to 630 square feet!
- Helps stop air leaks, which lowers your heating and cooling costs.
- Cures quickly, so you can get back to using the space fast.
- Sticks well to many surfaces like wood and drywall.
- Great for sealing around pipes, wires, and in attics and basements.
- It’s eco-friendly and meets important building standards.
- Comes with everything you need to get started, including a special spray gun.
What Could Be Improved:
- You need to be home to sign for the delivery.
- You’ll need to buy your own safety gear like gloves and a mask.
This Froth Pak kit offers excellent performance for DIY insulation projects. It’s a reliable way to improve your home’s energy efficiency and comfort.
4. Sprayman Spray Foam Insulation Kit (240 Sq.Ft.) – Closed Cell Polyurethane Expanding Foam Sealant

Rating: 9.2/10
Tired of high energy bills and noisy rooms? The Sprayman Spray Foam Insulation Kit (240 Sq.Ft.) offers a powerful solution for both. This closed-cell polyurethane expanding foam sealant provides excellent thermal and acoustic protection, making it ideal for walls and attics. With a gun and cleaner included, and a 12-pack of 27.1 oz cans, you have everything you need to get started on your insulation project.
What We Like:
- It’s Class-A Fire Rated, meaning it’s safe and reliable.
- It can help you save a lot of money on energy costs, up to 60%!
- The foam creates a strong bond and is paintable, so you can finish your project nicely.
- It’s designed to be user-friendly and won’t warp window or door frames.
- It sticks well to many different surfaces like wood, concrete, metal, and even car parts.
- It works well in temperatures between 41°F and 86°F, and you can get the best results by warming the can to 68°F.
What Could Be Improved:
- The color might change if it’s in direct sunlight for too long.
- You need to use two different nozzles for different jobs (vertical vs. ceiling).
This kit offers a durable and effective way to improve your home’s comfort and save energy. It’s a great choice for DIY insulation projects.
5. Spray Foam Insulation Kit (24 PK Kit-25.4oz)

Rating: 9.3/10
This LISRUX Spray Foam Insulation Kit is a game-changer for anyone looking to make their home more energy-efficient and comfortable. This kit comes with everything you need to create a superior seal, saving you money on energy bills year-round.
What We Like:
- Energy Savings: This foam offers excellent thermal performance (R-Value 5.66/inch), helping you save 40% to 60% on energy costs.
- Environmentally Friendly: It uses HFO blown technology, meaning it’s free of harmful gases and doesn’t harm the ozone layer.
- Great Coverage: One kit can cover up to 480 square feet at a 1-inch thickness, thanks to its improved formula.
- Complete Seal: It creates a continuous barrier against air, water, and pests, sealing even tricky corners and surfaces.
- Durable Performance: The foam is long-lasting, paintable, and can handle extreme temperatures from -86°F to 176°F.
- All-Inclusive Kit: The package includes 24 cans of foam, cleaner, an application gun, nozzles, goggles, and gloves, so you have all the tools ready.
What Could Be Improved:
- Application Conditions: It works best in temperatures above 68°F and humidity above 40%, which might limit use during colder months.
- One Can at a Time: You need to use one can completely before moving to the next to prevent the foam from drying out in the nozzle.
This LISRUX Spray Foam Insulation Kit provides an effective and eco-friendly solution for improving your home’s insulation. It’s a comprehensive package that empowers you to tackle insulation projects with confidence.
Your Guide to DIY Spray Foam Insulation
Thinking about tackling your home’s insulation with spray foam? It’s a smart choice for sealing up air leaks and making your home more comfortable and energy-efficient. This guide will help you pick the right DIY spray foam kit and use it like a pro.
Why Choose DIY Spray Foam?
DIY spray foam kits are a great way to save money on insulation projects. They’re designed for homeowners to use themselves. This foam expands to fill every nook and cranny. This creates a powerful barrier against air leaks. This means less energy loss and lower heating and cooling bills.
Key Features to Look For
When you’re shopping for a DIY spray foam kit, keep these important features in mind:
Types of Foam
- Closed-cell foam: This is denser and stronger. It acts as a vapor barrier. It’s good for areas where you need a rigid seal, like rim joists or basement walls.
- Open-cell foam: This foam is softer and more flexible. It’s great for filling larger cavities like attics or crawl spaces. It doesn’t block moisture as much as closed-cell.
Coverage Area
Kits are sold by the board foot. This is a measure of volume (1 foot by 1 foot by 1 inch thick). Check how many board feet a kit covers. Make sure it’s enough for your project. It’s better to have a little extra than not enough.
Ease of Use
Look for kits with simple instructions and easy-to-use applicators. Some kits come with pre-attached hoses and nozzles. This makes the process smoother. Read reviews to see what other DIYers say about how easy the kit is to use.
R-Value
The R-value tells you how well the insulation resists heat flow. Higher R-values mean better insulation. Closed-cell foam generally has a higher R-value per inch than open-cell foam.
Important Materials and Tools
You’ll need more than just the spray foam kit. Gather these items before you start:
- Safety Gear: This is crucial! You need a respirator mask (specifically for organic vapors), safety glasses or goggles, and gloves. The foam chemicals can be harmful if inhaled or if they touch your skin.
- Protective Clothing: Wear old clothes that you don’t mind getting foam on. Foam is very hard to remove once it dries.
- Drop Cloths or Plastic Sheeting: Cover anything you don’t want to spray. Foam can stick to surfaces.
- Utility Knife or Foam Cutter: You’ll use this to trim any excess foam after it cures.
- Fan: Good ventilation is important during and after application.
Factors That Improve or Reduce Quality
The quality of your DIY spray foam job depends on a few things:
Factors That Improve Quality:
- Proper Surface Preparation: Make sure surfaces are clean, dry, and free of dust or debris.
- Correct Mixing: Follow the kit’s instructions for mixing the two components.
- Even Application: Apply the foam in thin, even passes. Don’t try to fill a large cavity all at once.
- Adequate Ventilation: Ensure good airflow during and after application.
- Wearing Safety Gear: Protect yourself from the chemicals.
Factors That Reduce Quality:
- Cold Temperatures: Most spray foam works best in warmer temperatures. Check the kit’s temperature requirements.
- Moisture on Surfaces: Foam won’t stick well to wet surfaces.
- Over-Spraying: Applying too much foam at once can cause it to expand unevenly or not cure properly.
- Skipping Safety Steps: This is dangerous and can lead to health problems.
User Experience and Use Cases
DIY spray foam is popular for many home improvement projects.
Common Use Cases:
- Attics: Sealing the attic floor or the underside of the roof deck.
- Crawl Spaces: Insulating the walls of your crawl space.
- Basement Rim Joists: This is a common area for air leaks.
- Garages: Insulating walls to create a more comfortable workshop.
- Ductwork: Sealing around HVAC ducts to improve efficiency.
Most users find DIY spray foam to be a rewarding project. It takes patience and attention to detail. The results, however, are often significant. You’ll notice a difference in comfort and energy bills. Just remember to follow all safety guidelines and the manufacturer’s instructions carefully. Happy foaming!
Frequently Asked Questions (FAQ)
Q: What is the main benefit of DIY spray foam insulation?
A: The main benefit is its ability to create a superior air seal, which leads to better energy efficiency and comfort in your home.
Q: How much does a DIY spray foam kit typically cost?
A: The cost varies depending on the size of the kit and the type of foam, but they can range from $100 to $500 or more.
Q: Can I use DIY spray foam in my basement?
A: Yes, it’s excellent for insulating basement rim joists and walls to prevent air leaks and moisture issues.
Q: Is DIY spray foam safe to use?
A: Yes, when used with the proper safety equipment and ventilation, it is safe. Always wear a respirator, gloves, and eye protection.
Q: How long does it take for spray foam to cure?
A: Most DIY spray foams cure within minutes to a few hours, but it’s best to check the product’s specific instructions.
Q: Can I paint over spray foam?
A: Yes, most spray foams can be painted once they have fully cured. It’s good to check the manufacturer’s recommendations.
Q: What happens if I spray too much foam?
A: If you spray too much at once, it might not expand properly or could create an uneven surface. You can trim excess foam after it cures.
Q: Do I need special training to use a DIY spray foam kit?
A: While no formal training is required, carefully reading and following the manufacturer’s instructions is essential for a successful and safe application.
Q: Can I use DIY spray foam to insulate pipes?
A: Yes, it can be used to insulate pipes, especially to seal air leaks around them and prevent heat loss.
Q: Where can I buy DIY spray foam insulation kits?
A: You can typically find them at home improvement stores or online retailers that sell building materials.
In conclusion, every product has unique features and benefits. We hope this review helps you decide if it meets your needs. An informed choice ensures the best experience.
If you have any questions or feedback, please share them in the comments. Your input helps everyone. Thank you for reading.

Hi, I’m Mette Morgan—a lifelong pet enthusiast and the heart behind PetNobs.com.. My journey with animals began at an early age, and over the years, I’ve gathered invaluable experiences and insights on everything from everyday pet care to the unique quirks each animal brings to our lives. Here at PetNobs, I share my genuine passion, practical tips, and personal stories to help you create a loving, well-informed environment for your furry, feathered, or scaled friends. Welcome to my little corner of the pet world—it’s a joy to have you here!